Click here to join perioangroup
Click to join perioangroup
Powered by health.groups.yahoo.com
Subscribe to perioangroup
Powered by health.groups.yahoo.com
Add to Google

2006-03-31

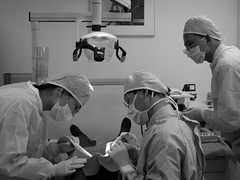
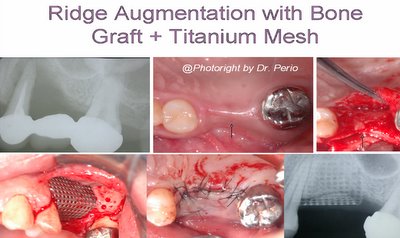
Localized ridge augmentation using titanium mesh

A configured titanium mesh (CTM) is served as a mechanical and biologic device for restoring a vertically defected/resorbed alveolar ridge.


Vertical ridge augmentation using xenogenic material supported by a configured titanium mesh: clinicohistopathologic and histochemical study
Artzi Z, Dayan D, Alpern Y, Nemcovsky CE.
Int J Oral Maxillofac Implants, Vol. 18, No.3, pp:440-446,2003.

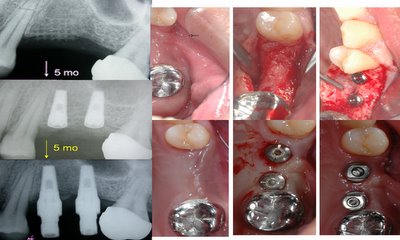
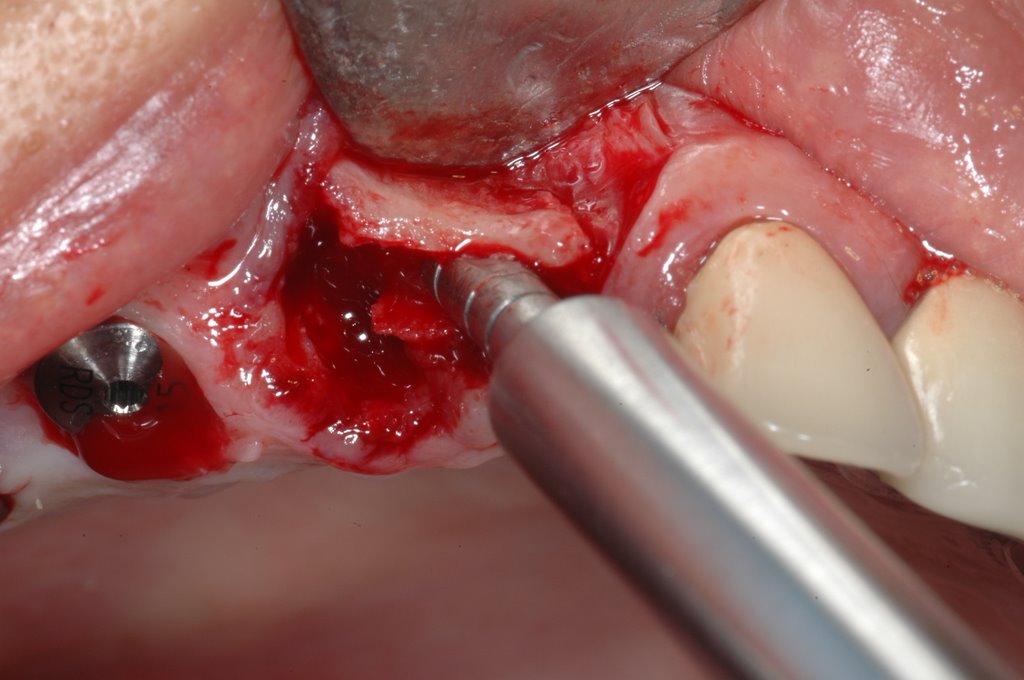
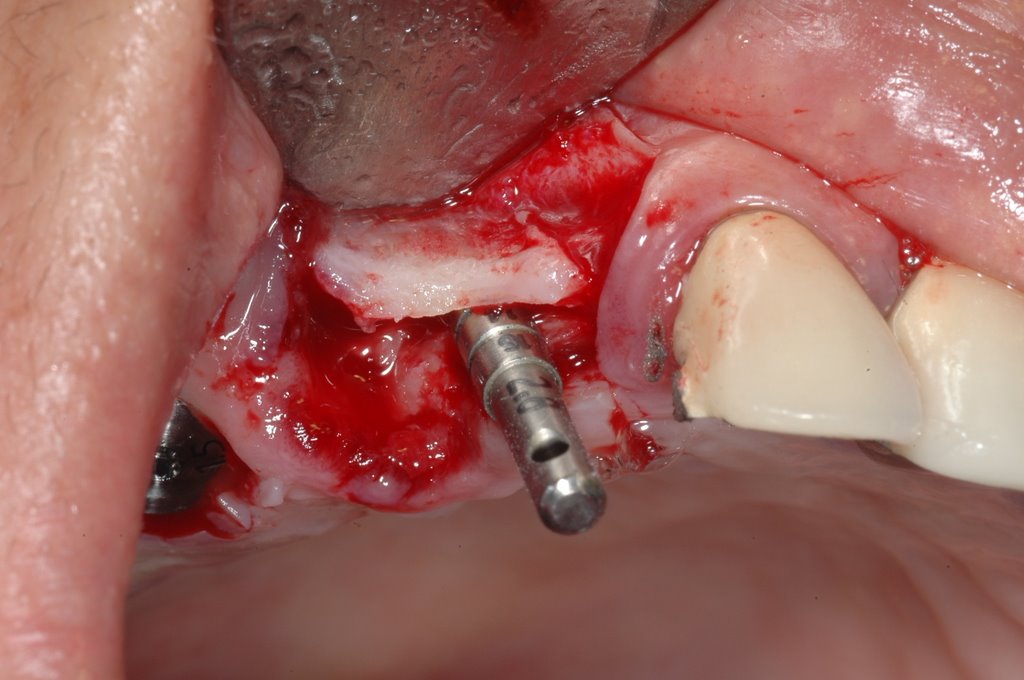
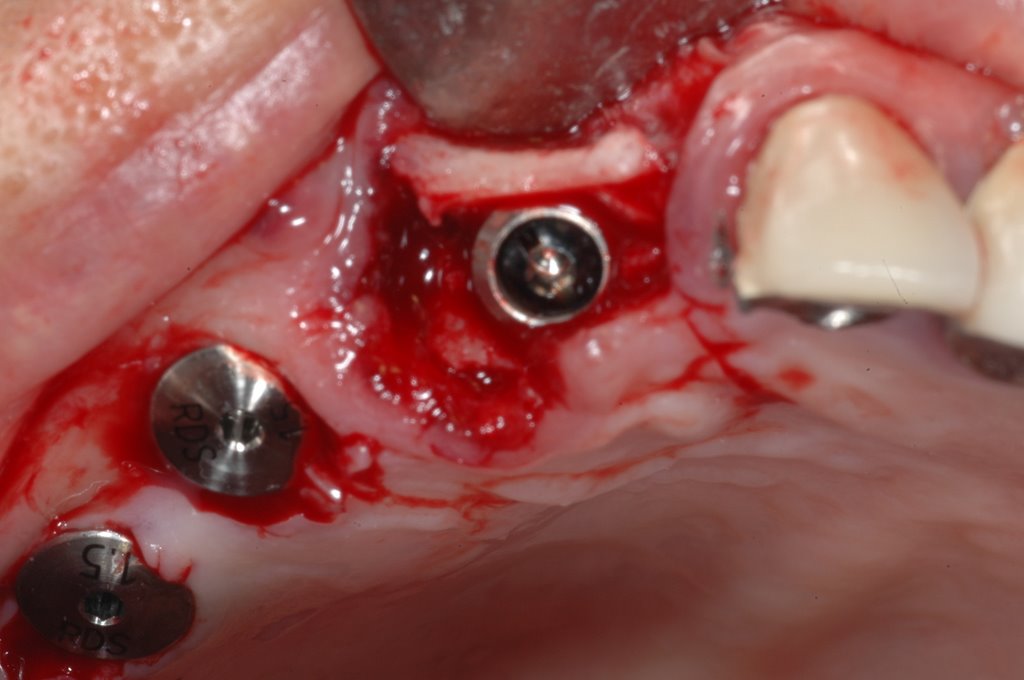
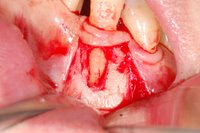
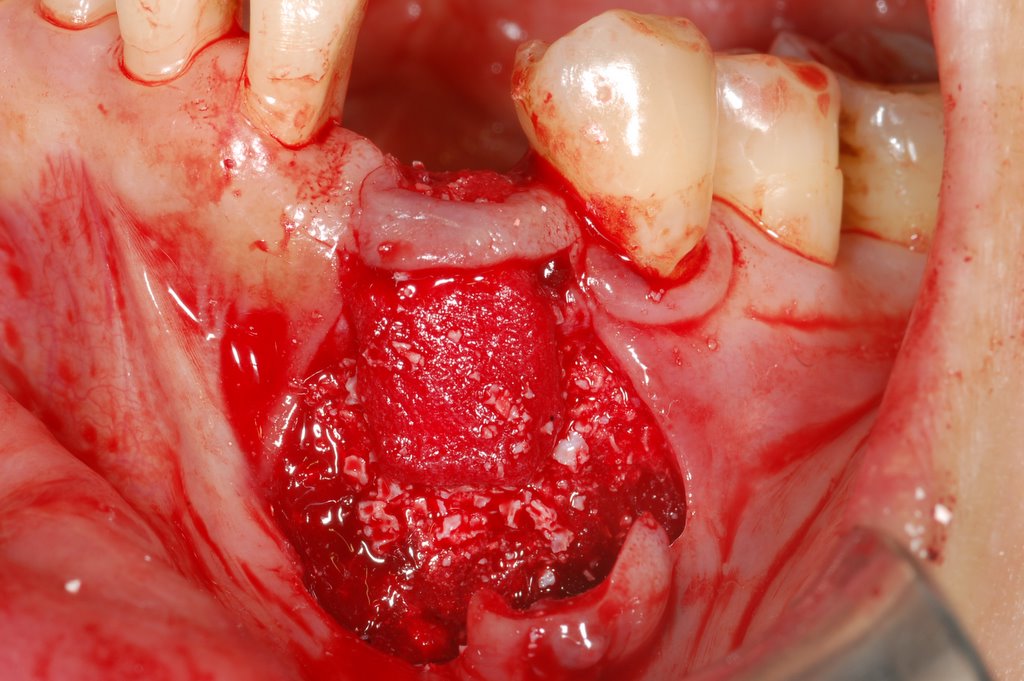
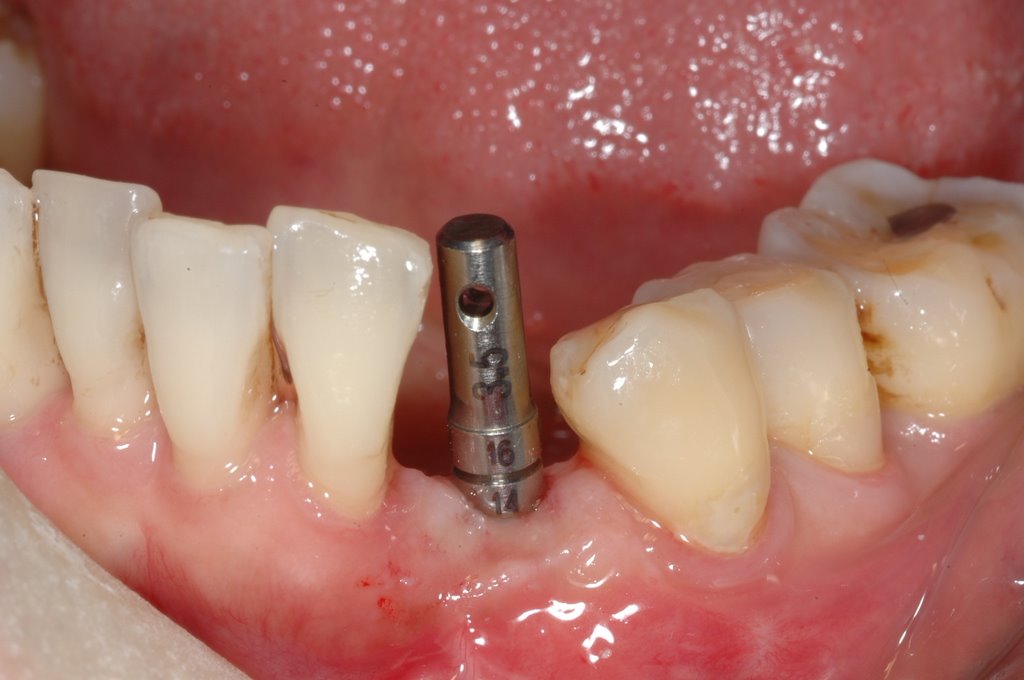
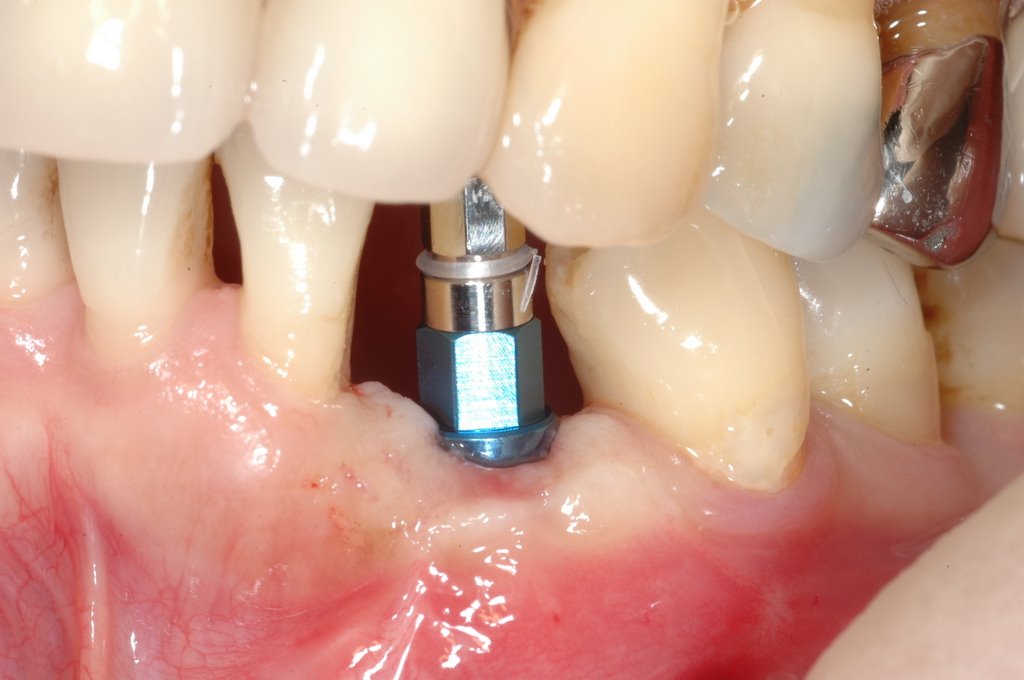
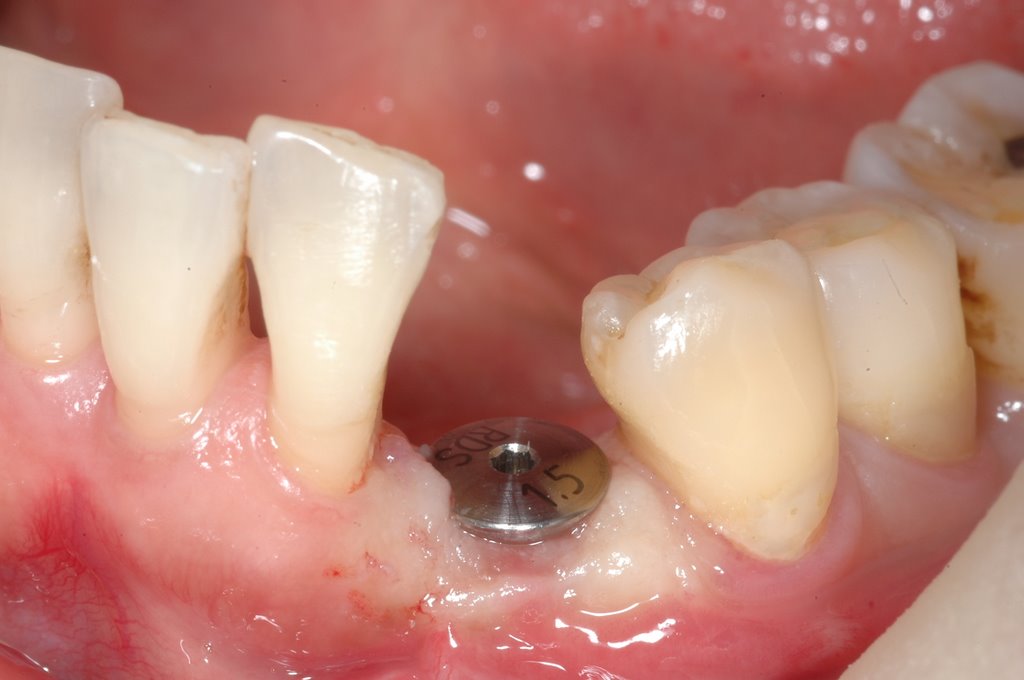
MATERIALS AND METHODS: The study comprised 10 severely resorbed sites in 10 patients. Pre- and post-operative ridge measurements were taken with reference to the neighboring teeth and supporting screw head base of the CTM. Bio-Oss® served as the augmentation filler material. The metal mesh was removed after 9 months. Subsequently, root-form, screw-type implants were placed. During the implant placement phase, cylindric bone samples were retrieved from the augmented area for histopathologic and histochemical examination.
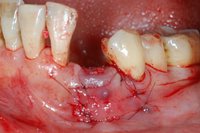
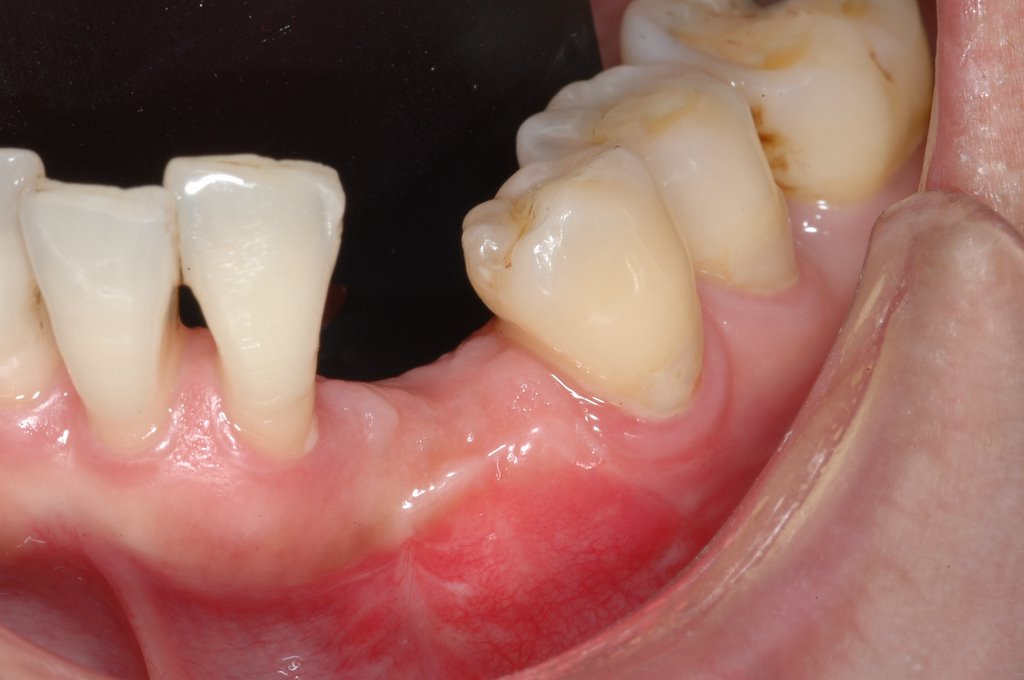
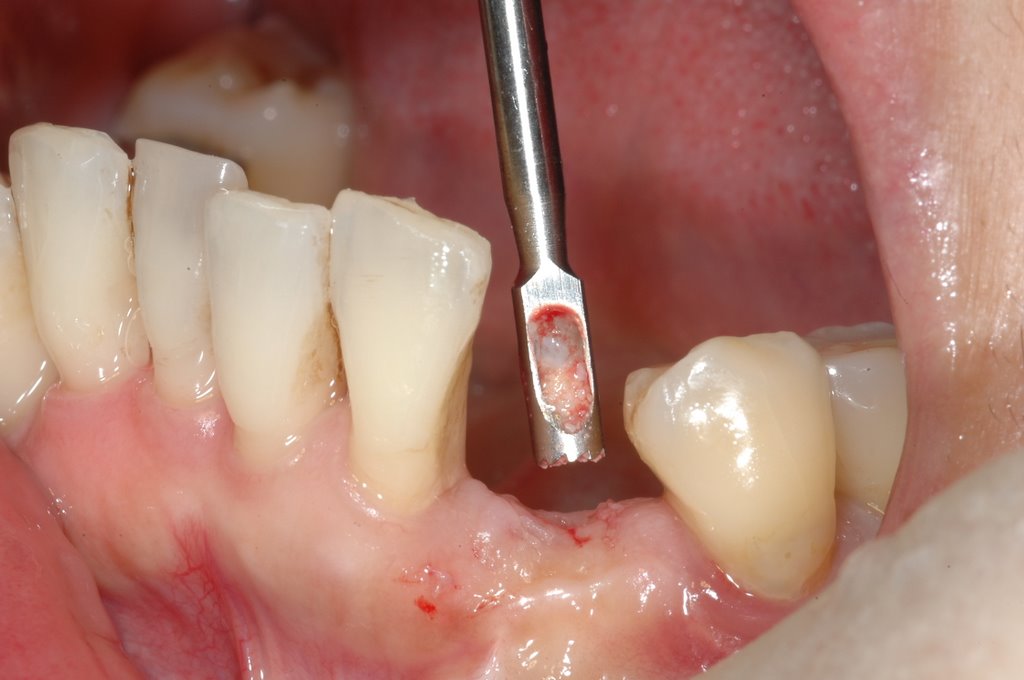
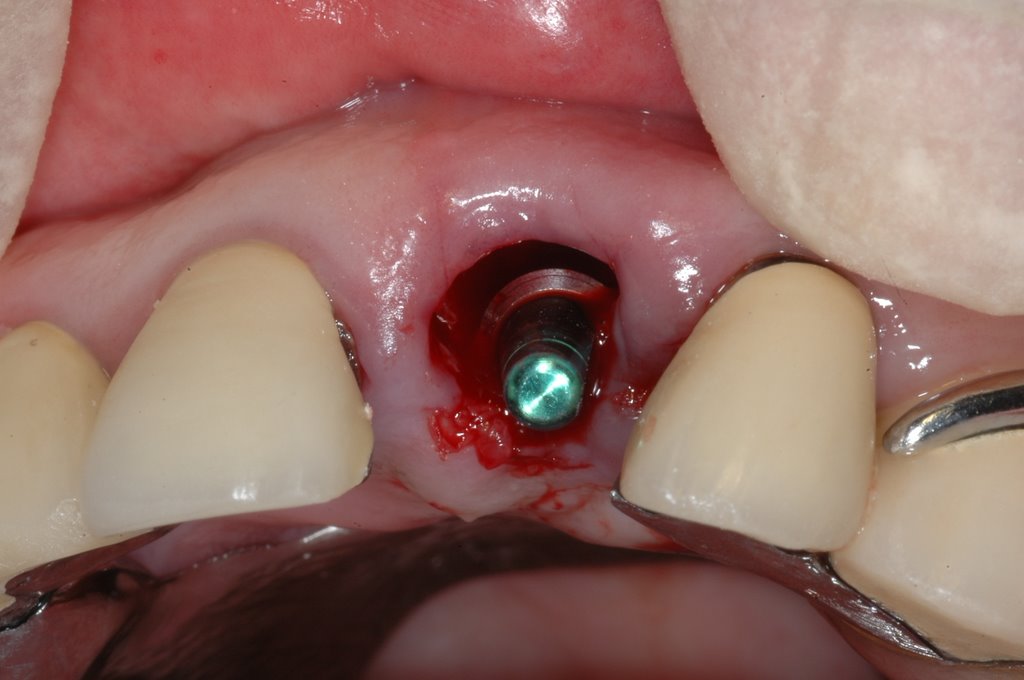
RESULTS: Upon soft tissue reflection and before augmentation, defect height, as recorded by a periodontal probe along the main threads exposed on the support screw, was between 5 and 8 mm (average 6.4 mm; SD +/- 1.17). At 9 months after augmentation, during the implant placement phase, the defect height was between 0 and 2 mm (average 1.2 mm; SD +/- 0.63). Differences were statistically significant (P < .001). Bone height gain was between 4 and 6 mm (average 5.2 mm, SD +/- 0.79), which gave an average bone fill of 81.2% (SD +/- 7.98). Polarizing microscopic examination of sections stained with Picrosirius red showed a gradual increase in new lamellar bone from coronal to apical cuts, reaching the highest area percentage in the deep apical zone. DISCUSSION: At 9 months postaugmentation using the CTM surgical technique, the quality and quantity of the newly established hard tissue appeared to be different in the coronal versus apical areas of the restored alveolar ridge.
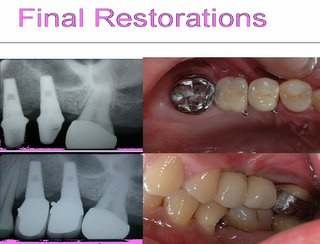
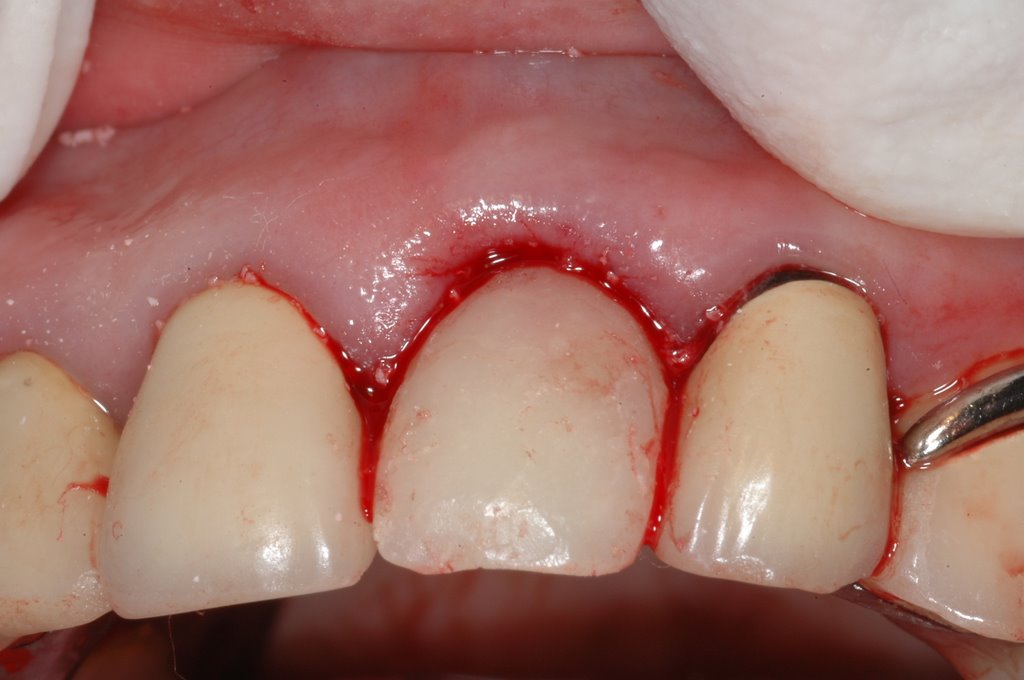
CONCLUSION: Although at 9 months postoperatively, the augmented alveolar ridge had different bone content, clinicohistochemical results demonstrated that this surgical technique could be a successful.

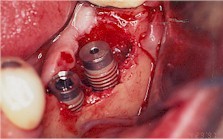
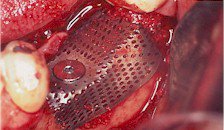
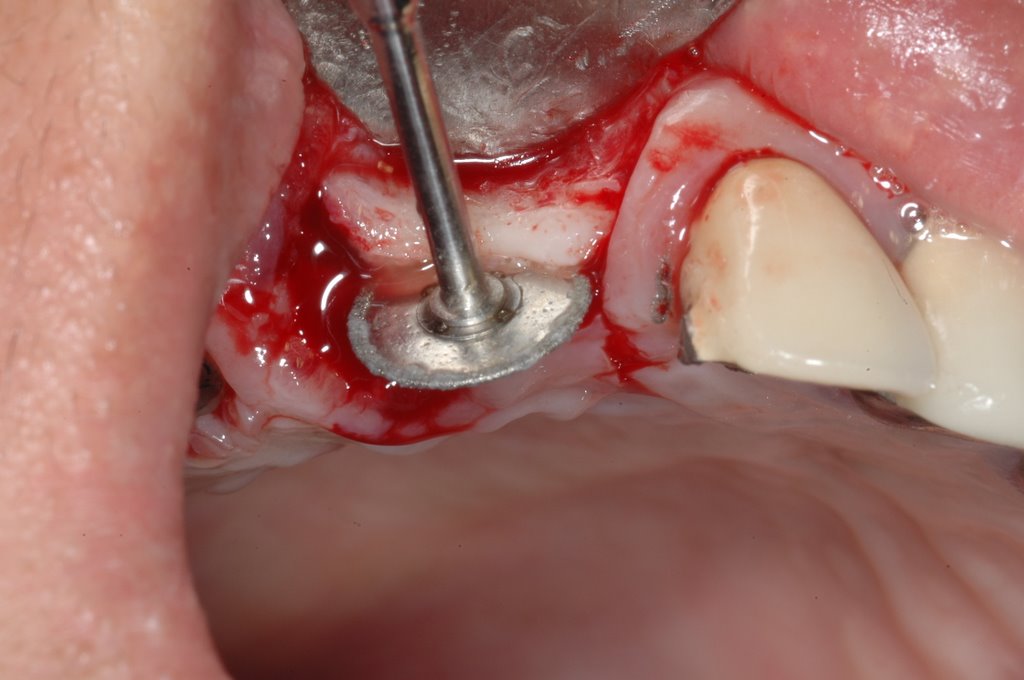
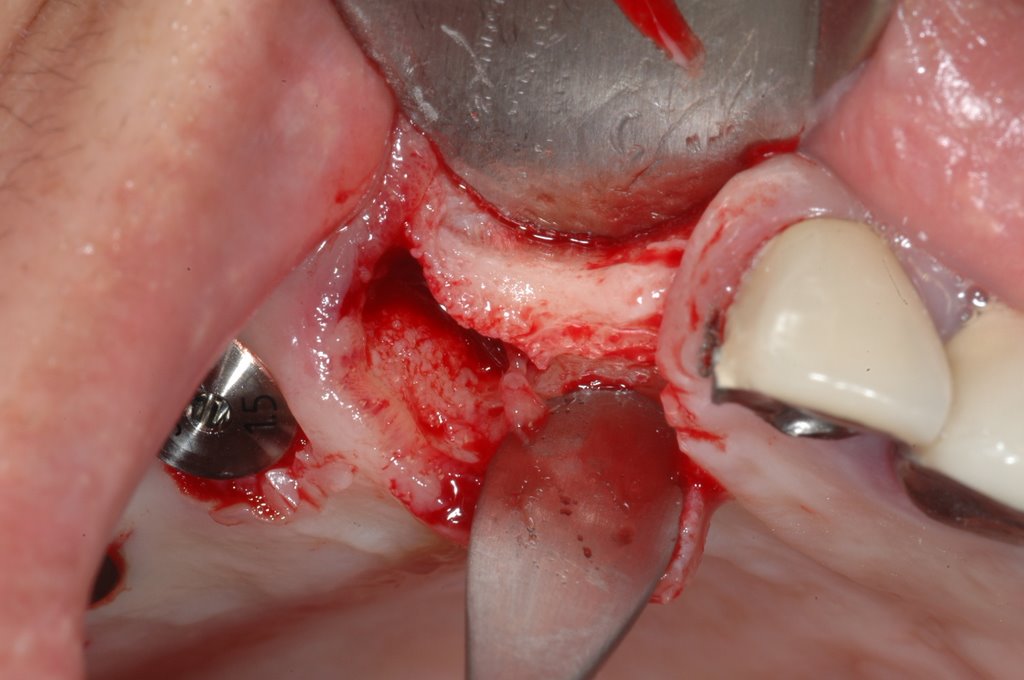
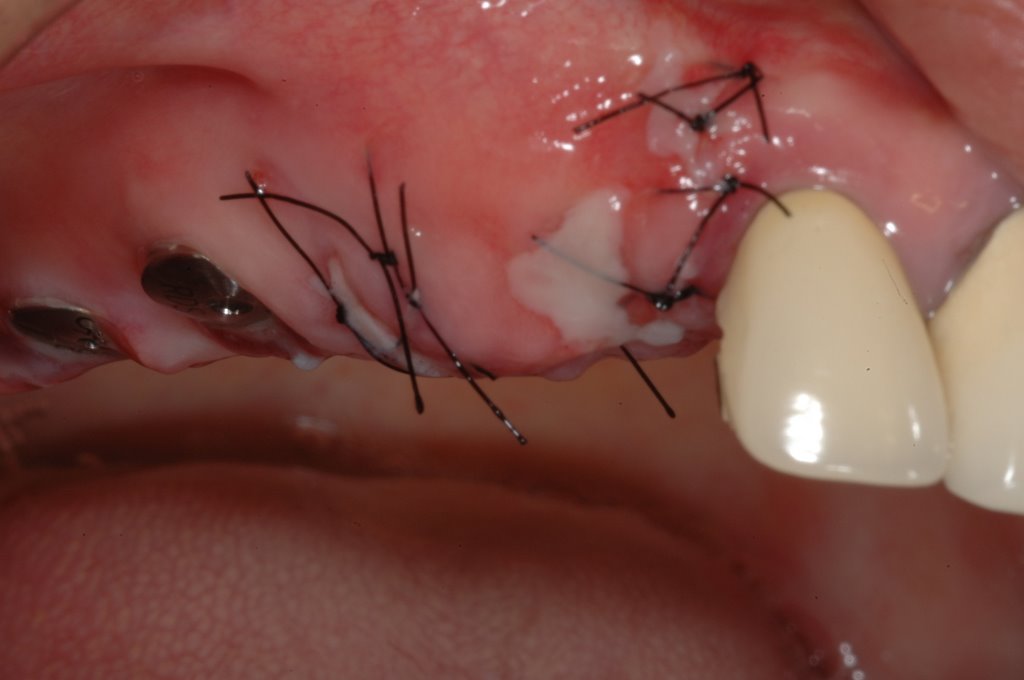
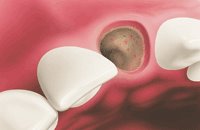
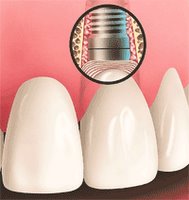
A Titanium Mesh is stabilized by screwing it onto one of the implants. Bone graft material is deposited under the Mesh and around the implants. The Mesh is then formed into the desired ridge shape and the gum tissue pulled over the entire site and sutured together. The Mesh will protect the graft from chewing forces while still allowing blood flow through the opening areas. Because the graft site will remain below the gum tissue during the initial growth period, it will also be protected from bacteria. The Mesh will remain under the gum tissue TEMPORARILY for approximately six weeks to a six months period while bone grows into the space under the Mesh.

Free Article>>>Three-Dimensional Bone Reconstruction in thePosterior Mandible Using DFDBA in a BiologicCarrier Matrix and Titanium Mesh

@@Clinical Application by Dr Perio

@Titanium Membranes in Prevention of Alveolar Collapse After Tooth Extraction. Implant Dentistry. 15(1):53-61, 2006. Pinho et al.

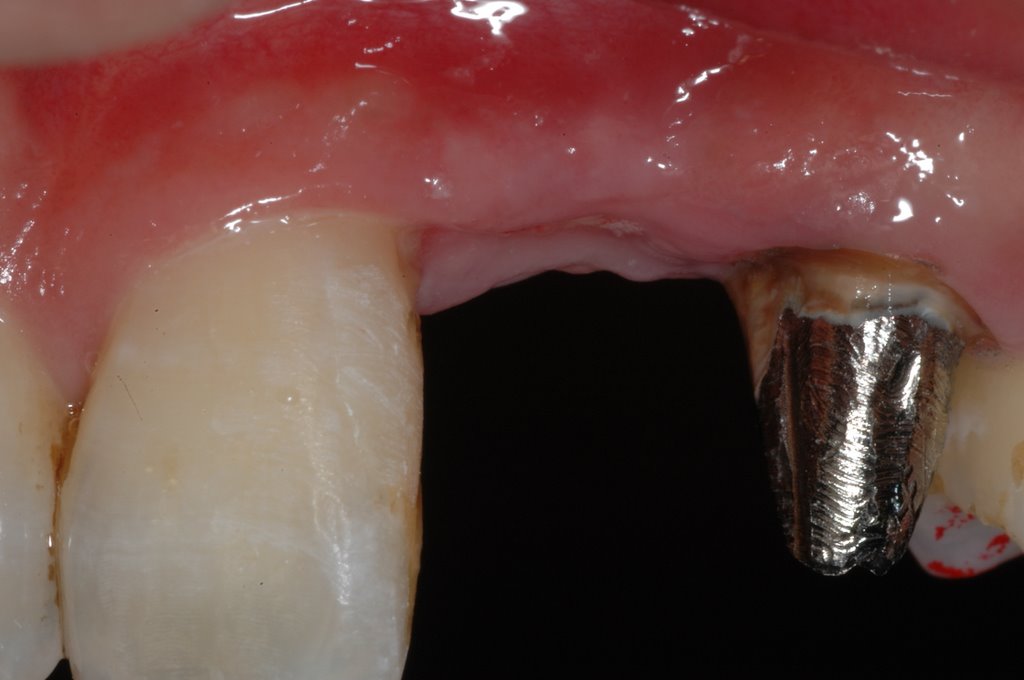
Background and Purpose: The resorption of alveolar bone following tooth extraction results in a narrowing and shortening of the residual ridge, which leads to esthetic and restorative problems, and reduces the bone volume available for implant therapy. The aim of this study was to evaluate the prevention of alveolar collapse after tooth extraction, using titanium membrane (Frios Boneshield; DENTSPLY Friadent, Mannheim, Germany), associated (or not) with autologous bone graft.
Materials and Methods: A total of 10 nonsmoking healthy subjects, ranging from 35 to 60 years old, were selected for this study. Each patient had a minimum of 2 uni-radicular periodontally hopeless teeth, which were scheduled for extraction. After the procedure, 2 titanium pins were fixed on the vestibular bone surfaces that were used as references for the initial measures (depth, width, and height) of the socket. Of the sockets,1 was randomly chosen to be filled with autologous bone graft (test) removed from superior maxillary tuber, and the other one did not receive the graft (control). A titanium membrane was adapted and fixed, covering the sockets, which remained for at least 10 weeks. After a 6-month healing, the final measures were performed.
Results: There was exposure of the membrane in 5 of the 10 treated subjects. Average bone filling (+/-standard deviation) among the 10 subjects was 8.80 +/- 2.93 mm (range 4-13) in the control group and 8.40 +/- 3.35 mm (range 4-13) in the test group. Average bone loss in width in both group was 1.40 +/- 1.97 mm (range -4-1) in the control group and 1.40 +/- 0.98 mm (range -4-0) in the test group. There was no significant statistical difference between groups considering the evaluated standards.
Conclusion: The use of titanium membrane, alone or in association with autogenous bone, favored the prevention of alveolar ridge after tooth extraction. This membrane seems to be a possible and safe alternative to other nonresorbable membranes when the prevention of alveolar ridge resorption is the objective.

@ Question from Dr. Perio

Is it necessary to put a resorbable membrane over the Titanium mesh + bone grafting for GBR before dental implantation? Comments...

2006-03-30

Ridge spitting / expansion for dental implantation

Ridge spitting / expansion for dental implantation:
tooth#14 extraction + tooth#13 ridge splitting and immediate dental implantation (Surgery by Dr. Perio)


>>>post Sx 10 days

@An article about ERE:
Clinical application of maxillary endossenous implant with edentulous ridge expansion technique

Huang Y, Ou Y, Song G.
Guangdong Provincial Stomatological Hospital, Guangzhou 510280, China

OBJECTIVE: To evaluate the application and the effect of edentulous ridge expansion(ERE) technique in maxillary endossenous implant placement. METHODS: 49 patients with maxillary alveolar ridge atrophy received edentulous ridge expansion using condenser. In order to be similar to natural root, dental implants were selected and placed to tooth missed sites according to the requirements of aesthetics, function and dimension. RESULTS: 49 patients with atrophied alveolar ridge received 86 implants. The labio-lingual width augmented from 3.3 to 5.4 mm and the alveolar ridge height from 2 to 7 mm 6 months after operation. The implants osseintergrated tightly with alveolar bone and second-step prosthesis was performed 6 months after implant placement. CONCLUSION: The edentulous ridge expansion technique can meet the requirements of aesthetics and function and is applicable to endossenous implant placement in maxilla. The method is simple and valuable to clinical application

2006-03-24

Bio-Col Socket Preservation Technique

SOCKET GRAFT is indicated when the clinician wants to preserve the maximum amount of bone after tooth extraction. SOCKET GRAFT is designed to retain the alveolar ridge and speed bone fill into the socket. However, SOCKET GRAFT will not rebuild any part of the ridge lost prior to placement of SOCKET GRAFT. If the clinician knows prior to extraction that a significant amount of alveolar ridge is missing and more ridge is needed for implant placement or for esthetics then a ridge augmentation procedure is indicated with the use of hard bone graft material and the placement of a barrier to retain the graft.
Ridge Preservation for Optimum Aesthetics and Function. The primary goal of any ridge preservation technique should be to preserve both the hard and soft tissues, especially the interdental papillae, in such a way as to optimize aesthetics and function. The Bio-Col Socket Preservation Technique with an understanding of these goals and biological considerations, the "Bio-Col" socket preservation technique was developed. The surgical protocol ensures the preservation of both hard and soft tissues at the time of tooth extraction, and it virtually eliminates the bone resorption that would normally follow tooth removal.


1. Top View: Bleeding Extraction Socket with No Defect. Tooth is extracted atraumatically without flap reflection. Note intact bony walls of extraction socket and preservation of surrounding gingival anatomy.
2. Top View: Grafted Extraction Socket in Preparation for Conventional Prosthesis. Socket with intact bony walls is grafted up to alveolar crest with Bio-Oss® natural bone mineral. CollaPlug®* absorbable dressing is placed over the Bio-Oss® graft and sutured in place with a horizontal matress suture.
3. Buccal View in Transparency: Bio-Col Technique for Conventional Prosthesis. Socket with intact bony walls is grafted up to alveolar crest with Bio-Oss® graft material. CollaPlug® absorbable dressing is placed over the Bio-Oss® graft and maintained with suture. A removable or fixed provisional restoration with an ovate pontic extending 3 mm to 4 mm subgingivally is placed, compressing the CollaPlug® and supporting the surrounding soft tissue.
4. Top View: Bio-Col Technique With Immediate Implant Placement. Immediate implant placed into intact bony socket. Bio-Oss® bone mineral grafted between implant and bony socket walls. Implant fixture and Bio-Oss® graft covered with CollaPlug® absorbable collagen dressing. Horizontal mattress suture placed to maintain position of collagen wound dressing.
5. Buccal view in Transparency: Bio-Col Technique With Immediate Implant Placement. Procedure same as step 4 with the following addition: Tooth borne provisional restoration with a modified ovate pontic to avoid pressure over cover screw. Ovate pontic extends subgingivally to support surrounding soft tissues.
6. Top View: Compromised Extraction Socket With Buccal Wall Defect. After extraction, socket presents with a large buccal wall bone defect. Note the partial soft-tissue collapse into the defect area.
7. Top View: Grafted Compromised Extraction Socket in Preparation for Delayed Implant Placement or Conventional Prosthesis. After tooth removal, Bio-Gide® resorbable collagen membrane placed in prepared subperiosteal pocket, covering bony socket wall defect. Bio-Oss® bone mineral placed into the socket and defect area. Note that Bio-Oss® slightly expands the adjacent Bio-Gide® membrane and overlying soft tissues. CollaPlug® absorbable dressing is placed over the Bio-Oss® graft and maintained with suture.

8. Buccal View in Transparency: Grafted Compromised Socket in Preparation for Delayed Implant Placement or Conventional Prosthesis. Note Bio-Gide® membrane covering buccal wall socket defect. Procedure same as step 7 with the following addition: Provisional restoration with ovate pontic extending 3 mm to 4 mm subgingivally against CollaPlug® dressing, supporting surrounding soft tissues.

Clinical Case Report by Perio(Nov.05'):


Apical /clinical checkup 3 months later<<

@Flapless approach for dental implantation after Bio-col ridge augmentation: (Surgery by Dr. Perio )

#Apicl check-up after dental inplantation (Mar06')

>>> 3 months later !

@ Socket Augmentation: Rationale and Technique by Dr. Wang

@Free Article of Bio-Col ridge preservation technique


2006-03-22

Immediate dental implantation + Provisionalization

Immediate Load Implant Criteria

To do an immediate load implant, certain criteria have to be met. There has to be adequate bone, a large enough implant needs to be placed, and the implant once placed has to be able to resist at least 40 ncm of force.The temporary crown has to be adjusted so that no forces are placed on it during function. Meeting these criteria allows the bone to grow around the implant (osseointegration). After a period of nine weeks a permanent crown can placed.The following picture sequence demonstrates an ideal situation for an immediate load implant or what I call a Vanity Crown because the patient refused to go out in public with a missing tooth. A template was made of the tooth prior to removing the fractured root so as to facilitate fabrication of a temporary crown. An important factor in this procedure is to carefully remove the tooth without removing any bone in the process [Atrumatic extraction- detail see another blog a + b].

Clinical procedures: (78 y/o male pt' , AMI twice - Surgery/Restorative procedures by Dr. Perio)

  1. Preparation of Implant Socket
  2. Socket Drilling
  3. Precision Implant Placement
  4. Abutment insertion
  5. Temporary Crown
  6. X ray confirm

@For a complete step-by-step guide, download the Restorative Guide PDF.

Immediate Restoration Technique (Download from Zimmer Dental Co;.)
In a case with a failing tooth, perform an atraumatic extraction. Prepare surgical site according to the drilling sequence. Place the implant and select the appropriate abutment. Prepare extraorally and seat on implant with hex tool. Fabricate provisional prosthesis chairside and check occlusion to confirm no occlusal contacts are present. Cement in place using temporary cement. After the healing period, record full-arch impression and fabricate final restoration.
Immediate Provisional Restoration Presurgical (248k) Last updated: July 1, 2002

Immediate Provisional Restoration (328k) Last updated: July 1, 2002

2006-03-12

Interdental Papilla Recontruction


Loss of the interproximal papilla may create phonetic problems or predispose to interproximal food entrapment and is esthetically displeasing. An interproximal contact point and an adequate level of bone support are essential for maintenance of a healthy papilla that completely fills the interproximal space. If certain vertical or horizontal interproximal dimensions are exceeded, the papilla may be either partially or totally lost. For example, with excessive horizontal spacing,a diastema can develop and the papilla will be lost; vertically,the likelihood that the papilla will fill the interproximalspace decreases as the alveolar crest to contact point distance increases beyond 5 mm. Surgical therapy to reconstruct the papilla is a promising area of development that is surgically challenging due to the small size of the interproximal site and the lack of blood supply. Regeneration of lost papilla height with periodic curettage has been reported in cases of necrotizing ulcerative gingivitis. Orthodontic therapy to establish or lengthen a contact is useful incertain situations. Surgical techniques that have been utilized to reconstruct a lost papilla include a modification of the roll technique; soft tissue grafting, sometimes accompanied by a semilunar coronally positioned flap; or a combination of hard tissue and soft tissue grafting. Adapted from J perio: Informational Paper Oral Reconstructive and Corrective Considerationsin Periodontal Therapy*
@Key Articles:
1.http://www.quintpub.com/userhome/prd/prd_24_1_Carnio_3.pdf
2.http://www.quintpub.com/userhome/prd/prd_24_3_Pini_Prato_5.pdf

***"Surgical reconstruction of interdental papilla using interposed subepithelial CT graft" clinical procedures : (Surgery by Dr. Perio)